Forms
Introduction
Form Layouts are designed to supercharge your experience of setting up forms in Siteglide with these key objectives:
- Get started quicker. No need to copy and paste fields from the default layout into a custom layout anymore in order to add styling. With a click, you can have a styled form layout ready to go.
- Get consistent styles across your forms - Form layouts are modular, using component layouts to style individual UI-controls. This makes it easier to apply consistent styles between your contact form and secure zone signup form without editing every line individually. Just add the code for each component to that form's layout once.
- Low Maintenance - No need to change your form layout every time a new field is added or removed in the Admin. By choosing the dynamic option, your layout will automatically adapt to any changes in the Admin and display them in the form.
Currently Supported Siteglide Form Features
These are the currently supported form features out of the box. Feel free to add more to your Static Layouts (see more about static vs. dynamic layouts below) and we may add more if there is popular demand.
| Feature | Supported? |
| User CRM fields | ✔️ |
| CRM Address Book - Add Addresses and if applicable store against a checkout order. | ✔️ |
| Secure Zones Signup | ✔️ |
| eCommerce Checkout Form | ✔️ |
| eCommerce Basic Payment Form | ✔️ |
| eCommerce Quote Form | ✔️ |
| reCaptcha or hCaptcha | ✔️ |
| eCommerce Subscription Form | ✔️ Partial Support |
| CRM Address Book - Choose an existing Address | ❌ Not yet. Awaiting: https://roadmap.siteglide.com/core-platform/p/crm-update-existing-addresses |
| CRM Companies | ❌ |
| Change Email / Change Password | ✔️ |
| Custom Field Sets | ❌ |
| WebApp & Module Front End Item Create/Edit/Delete Forms | ✔️ |
Types of Layout
The Form Layouts are organised into sections based on the Siteglide feature they provide layouts for:
- CMS Forms
- WebApp Item Create Forms
- WebApp Item Update Forms
- Delete Forms
- Module Item Create Forms
- Module Item Update Forms
etc.
Click to learn more about WebApp CRUD Forms and Module CRUD Forms.
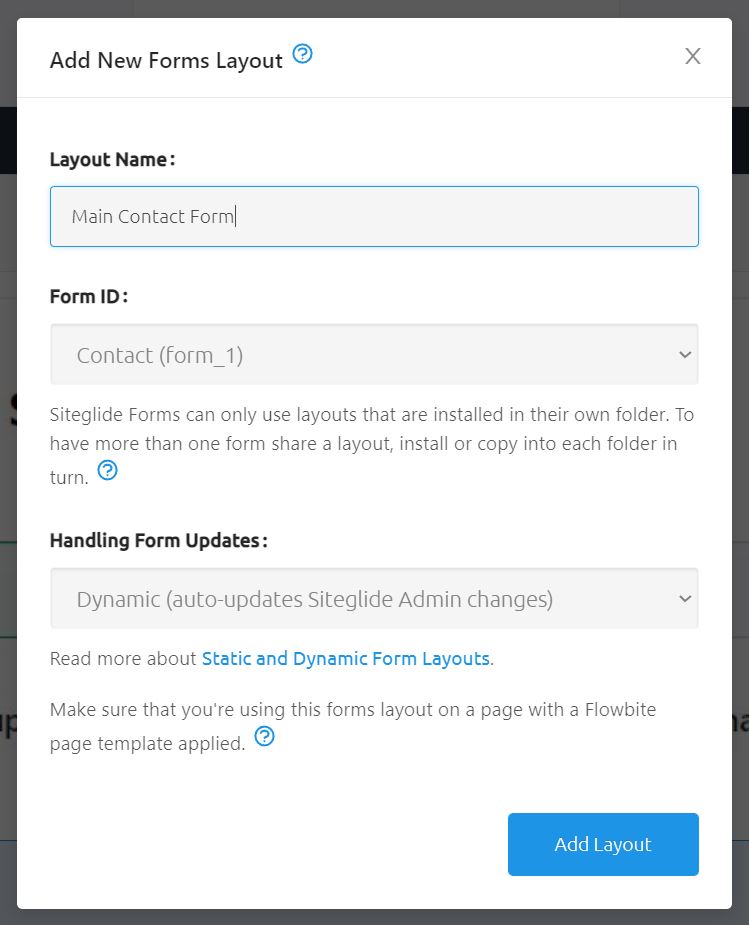
Layout Installation
The Form layouts can be installed in the same way as other SiteBuilder layouts, but with a few differences:
Note that it's recommended to output Update and Delete Forms for WebApps and Modules inside a WebApp Layout so that they inherit the correct ID and other data. This is why these layouts are not available directly on PageBuilder yet.
Choosing a Form
Siteglide stores form layouts in folders according to their form ID e.g. form_1 or form_2. When you install a form layout, we ask you which folder you want to install the layout into based on the form_id/ name. If you are installing a WebApp or Module CRUD form, the ID of the WebApp or Module will be used instead.
With dynamic layouts though, the form is not restricted to working on a single one of your forms. A contact form layout can be copied and pasted into another form folder and will work out of the box. We'll look more at static vs. dynamic layouts next.
Static or Dynamic?
When you install a SiteBuilder form layout, you must choose whether you need a static or a dynamic layout.
| Static Layout | Dynamic Layout | |
| Modular, component-based layouts for editing markup and styles consistently. | ✔️ | ✔️ |
| Quickly get started with a ready styled layout for your form. | ✔️ | ✔️ |
| Form layout files will work on any form without needing code changes. | ❌
Re-install the layout from SiteBuilder to create a version which will work on the new form. |
✔️ Note- they will need to be copied and pasted (or installed) into each form's layouts folder, but no changes in code needed! |
| No need to change your layout code when a new field or feature is added to the form in Admin.
The liquid code dynamically updates the HTML when the page is loaded by reading the fields defined in the Siteglide Admin form configuration. |
❌
Re-install the layout from SiteBuilder to create a version which will work with the new features. |
✔️ |
| Full control over re-ordering fields in the Layout Code. | ✔️ | ❌See the `defer_fields` parameter for options. |
| Can re-order fields in the file `marketplace_builder/views/partials/tables/forms/ |
❌ | ✔️ |
In summary, the main benefit of dynamic layouts is that they take very little code maintenance compared to traditional Siteglide form layouts. All features are controlled via the Siteglide Admin.
The main reason to choose static forms might be if you want full control over the order of your fields or the functionality in your form. In this case, you're using the power of SiteBuilder form layouts to get you started fast, then you're able to change anything you like from there-on-out.
If you're not sure, why not start with dynamic form layouts, then switch to static form layouts if you need to later.
Editing the Layouts
All form layouts have a main layout file, or wrapper, which takes the name you gave the layout and a subfolder of component layouts named after the layout, but with _components at the end. See the example below:
├───forms
│   ├───form_1
│   │   │   flowbite-contact-1-3.liquid
│   │   │
│   │   └───flowbite-contact-1-3_components
│   │           array_custom.liquid
│   │           basic_payment.liquid
│   │           boolean.liquid
│   │           checkout_standard.liquid
│   │           datasource.liquid
│   │           datasource_multi.liquid
│   │           date.liquid
│   │           email.liquid
│   │           file.liquid
│   │           folder.liquid
│   │           heading.liquid
│   │           hidden_fields.liquid
│   │           image.liquid
│   │           image_array.liquid
│   │           input_checkbox.liquid
│   │           input_radio.liquid
│   │           name_field.liquid
│   │           number_float.liquid
│   │           number_integer.liquid
│   │           password.liquid
│   │           quote_only.liquid
│   │           recaptcha.liquid
│   │           select.liquid
│   │           select_multi.liquid
│   │           string.liquid
│   │           subheading.liquid
│   │           subscription_detail.liquid
│   │           textarea.liquid
This file structure will be exactly the same whether you opt for a static or dynamic wrapper. The main difference between the two types of form layout will be the contents of the wrapper.
Static Wrapper
A static wrapper contains {% include %} liquid tags for each component in your form and passes them the data they need via parameters. These parameters may appear to be hardcoded, however, it was dynamically generated at the time the layout was created by SiteBuilder- it will just need editing if there are any subsequent changes in Admin.
Alternatively, after making changes to the form configuration, you can always use SiteBuilder to re-generate a new version of the layout with a new name and new parameters.
Dynamic Wrapper
A dynamic wrapper does not include components directly; instead it includes this include tag which runs the dynamic SiteBuilder script for fetching the latest configuration of the form:
{% include "modules/module_86/form_layout_fields", collection: 'true' %}
This tag can be passed parameters to modify its behaviour. Any of the parameters below can alternatively be added directly to the Siteglide {% include 'form' %} tag and the form_layout_fields include will inherit their values.
The collection Parameter
Setting collection: 'false' means the fields will be outputted in the HTML exactly in the place of the {% include 'form_layout_fields' %} tag.
Setting collection: 'true' allows you to re-position key groups of fields within your wrapper.
See available field groups below.
Outputting field groups on the page while using collection='true'
The available field groups are:
Siteglide and Custom Form Fields
This contains all Siteglide and all Custom Fields in the Form:
{{context.exports.sitegurus_ui.form_fields | html_safe: raw_text: true }}
Hidden Fields
This contains hidden fields needed to run the form:
{{context.exports.sitegurus_ui.form_hidden | html_safe: raw_text: true }}
Address Fields
This is an array which contains all CRM addresses added to the form, if any are present:
{% assign form_addresses = context.exports.sitegurus_ui.form_addresses | parse_json %}
{% for address in form_addresses %}
  <h3 class="h4 mb-5">{{address[0]}}</h3>
  <div class="row">
    {{address[1].html | html_safe: raw_text: true}}
  </div>
{% endfor %}
The code here will loop over them all and output them all, but you can edit this if you want to display Billing and Shipping addresses separately.
reCaptcha
This contains the hCaptcha or reCaptcha, if present:
{{context.exports.sitegurus_ui.form_recaptcha | html_safe: raw_text: true }}
Note that Siteglide recommends using hCaptcha with forms. This file however, continues to be named reCaptcha for backwards-compatibility reasons.
Payment Gateway
This contains the payment gateway and payment fields, if present:
{{context.exports.sitegurus_ui.form_payment | html_safe: raw_text: true }}
The disable_fields Parameter
disable_fields: can be passed a comma-separated string of field names to hide from the form. In the example above, the field called Name from the addresses is hidden.
The name field for the User's name and other mandatory Siteglide fields are exceptions. It cannot be removed from the form using this method.
The defer_fields Parameter
The defer_fields: parameter is useful where you want to use the advantages of dynamic form layouts for most of your fields, but also want to manually move a few key fields out of the main field output and into a separate section within the form.
To do this, first add the fields' names to a comma separated list in the defer_fields: parameter.
Then, you can output the individual field where you would like it using the following code:
{{context.exports.module_86.form_fields_deferred | detect: name: 'Example Field Name' | dig: 'html' | html_safe: raw_text: true }}
In fact, the full range of deferred fields are available as an array here:
{{context.exports.module_86.form_fields_deferred}}
Developers can use this to loop over the fields if they wish. The additional filters in the example above help to find the item in the array with the field name you need, access the HTML needed to output the field and finally bypass platformOS's sanitization so that the HTML is output as intended (see Form Layout Sanitization section for details).
This feature could also be useful if you wish to hide and show some fields conditionally and therefore require greater control over these.
The hide_name_while_logged_in and hide_email_while_logged_in Parameters
These parameters exist primarily for the use-case of implementing a form with multiple parts or sections, where each section is actually a form in its own right. Siteglide mandates the inclusion of the name and email fields in every form that outputs, but this solution allows you to hide these fields on the 2nd, 3rd etc. sections of the form while the user is logged in and their values are auto-filled behind the scenes (and is still submitted along with the form). This use-case is demonstrated on the Flowbite Demo Site:

For both parameters, the default is 'false' and turning on the feature is 'true'.
{% include "modules/module_86/form_layout_fields", collection: 'true', hide_name_while_logged_in: 'false', hide_email_while_logged_in: 'true' %}
If the user is not logged in, the fields will show as normal, as they are awaiting user input.
Important note: this functionality relies on the name_field and email components to contain code which will hide these fields, because the fields need to output, but hidden. If your component does not contain this code, you can add the example from below:
<div class="{% if context.current_user.id != blank and hide_email_while_logged_in == 'true' %} absolute w-0 h-0 invisible  {% endif %}" >
  <!-- Add rest of email component here. -->
</div>
<div class="{% if context.current_user.id != blank and hide_name_while_logged_in == 'true' %} absolute w-0 h-0 invisible  {% endif %}" >
  <!-- Add rest of name_field component here. -->
</div>
Parameters for editing email and password
Fields to edit email and password are not part of the Siteglide Form Configuration and are instead added by parameters.
Set include_email_editor to 'true' to include the edit_email component in the form.
Set include_password_editor to 'true' to include the edit_password component in the form.
Authorizing the Change
Including either of these parameters will also cause the current password component to display, as this is needed to authorise the change.
Validation
Siteglide provides server-side validation to ensure the security of this functionality.
On most form layouts we provide, the default behaviour for client-side validation is that if an edit_email or edit_password component is displayed on the form, it is required. This is the simplest behaviour to implement and makes sense if you have an account area with separate small forms for each possible action. If you have one large form and you want editing email/password to be optional, it might be sensible to add JavaScript to remove the required classes from the fields if they are empty, or to change this directly in the component layouts. You would also need to remove the required class from the password field in the situation that neither an attempt to change email, nor password was attempted.
Adding Confirmation Validation
Set confirm_email_password to 'true' and any email or password edit field will come along with a confirmation field for validation. This comes with client-side and server-side validation.
Troubleshooting Edit Email & Password
A form must have a secure zone set against it for this feature to work properly.
Editing Email & Password on Static Form Layouts
For Static Layouts, follow the Siteglide Documentation for editing emails & passwords. You can include the relevant components and pass the components the paramters above if you like.
The custom_form_redirect parameter
This is a quick way to override the form_redirect path that's set in the Siteglide Admin for a specific form. One common use case would be to set the form to redirect to the current page:
Prior to v. 4.6.3 this was already possible in hidden fields, so this parameter just adds the convenience of setting this at a higher level in the code. It relies on the new versions of the form layout's hidden
{% include 'form_layout_fields', custom_form_redirect: context.location.href %}
Components
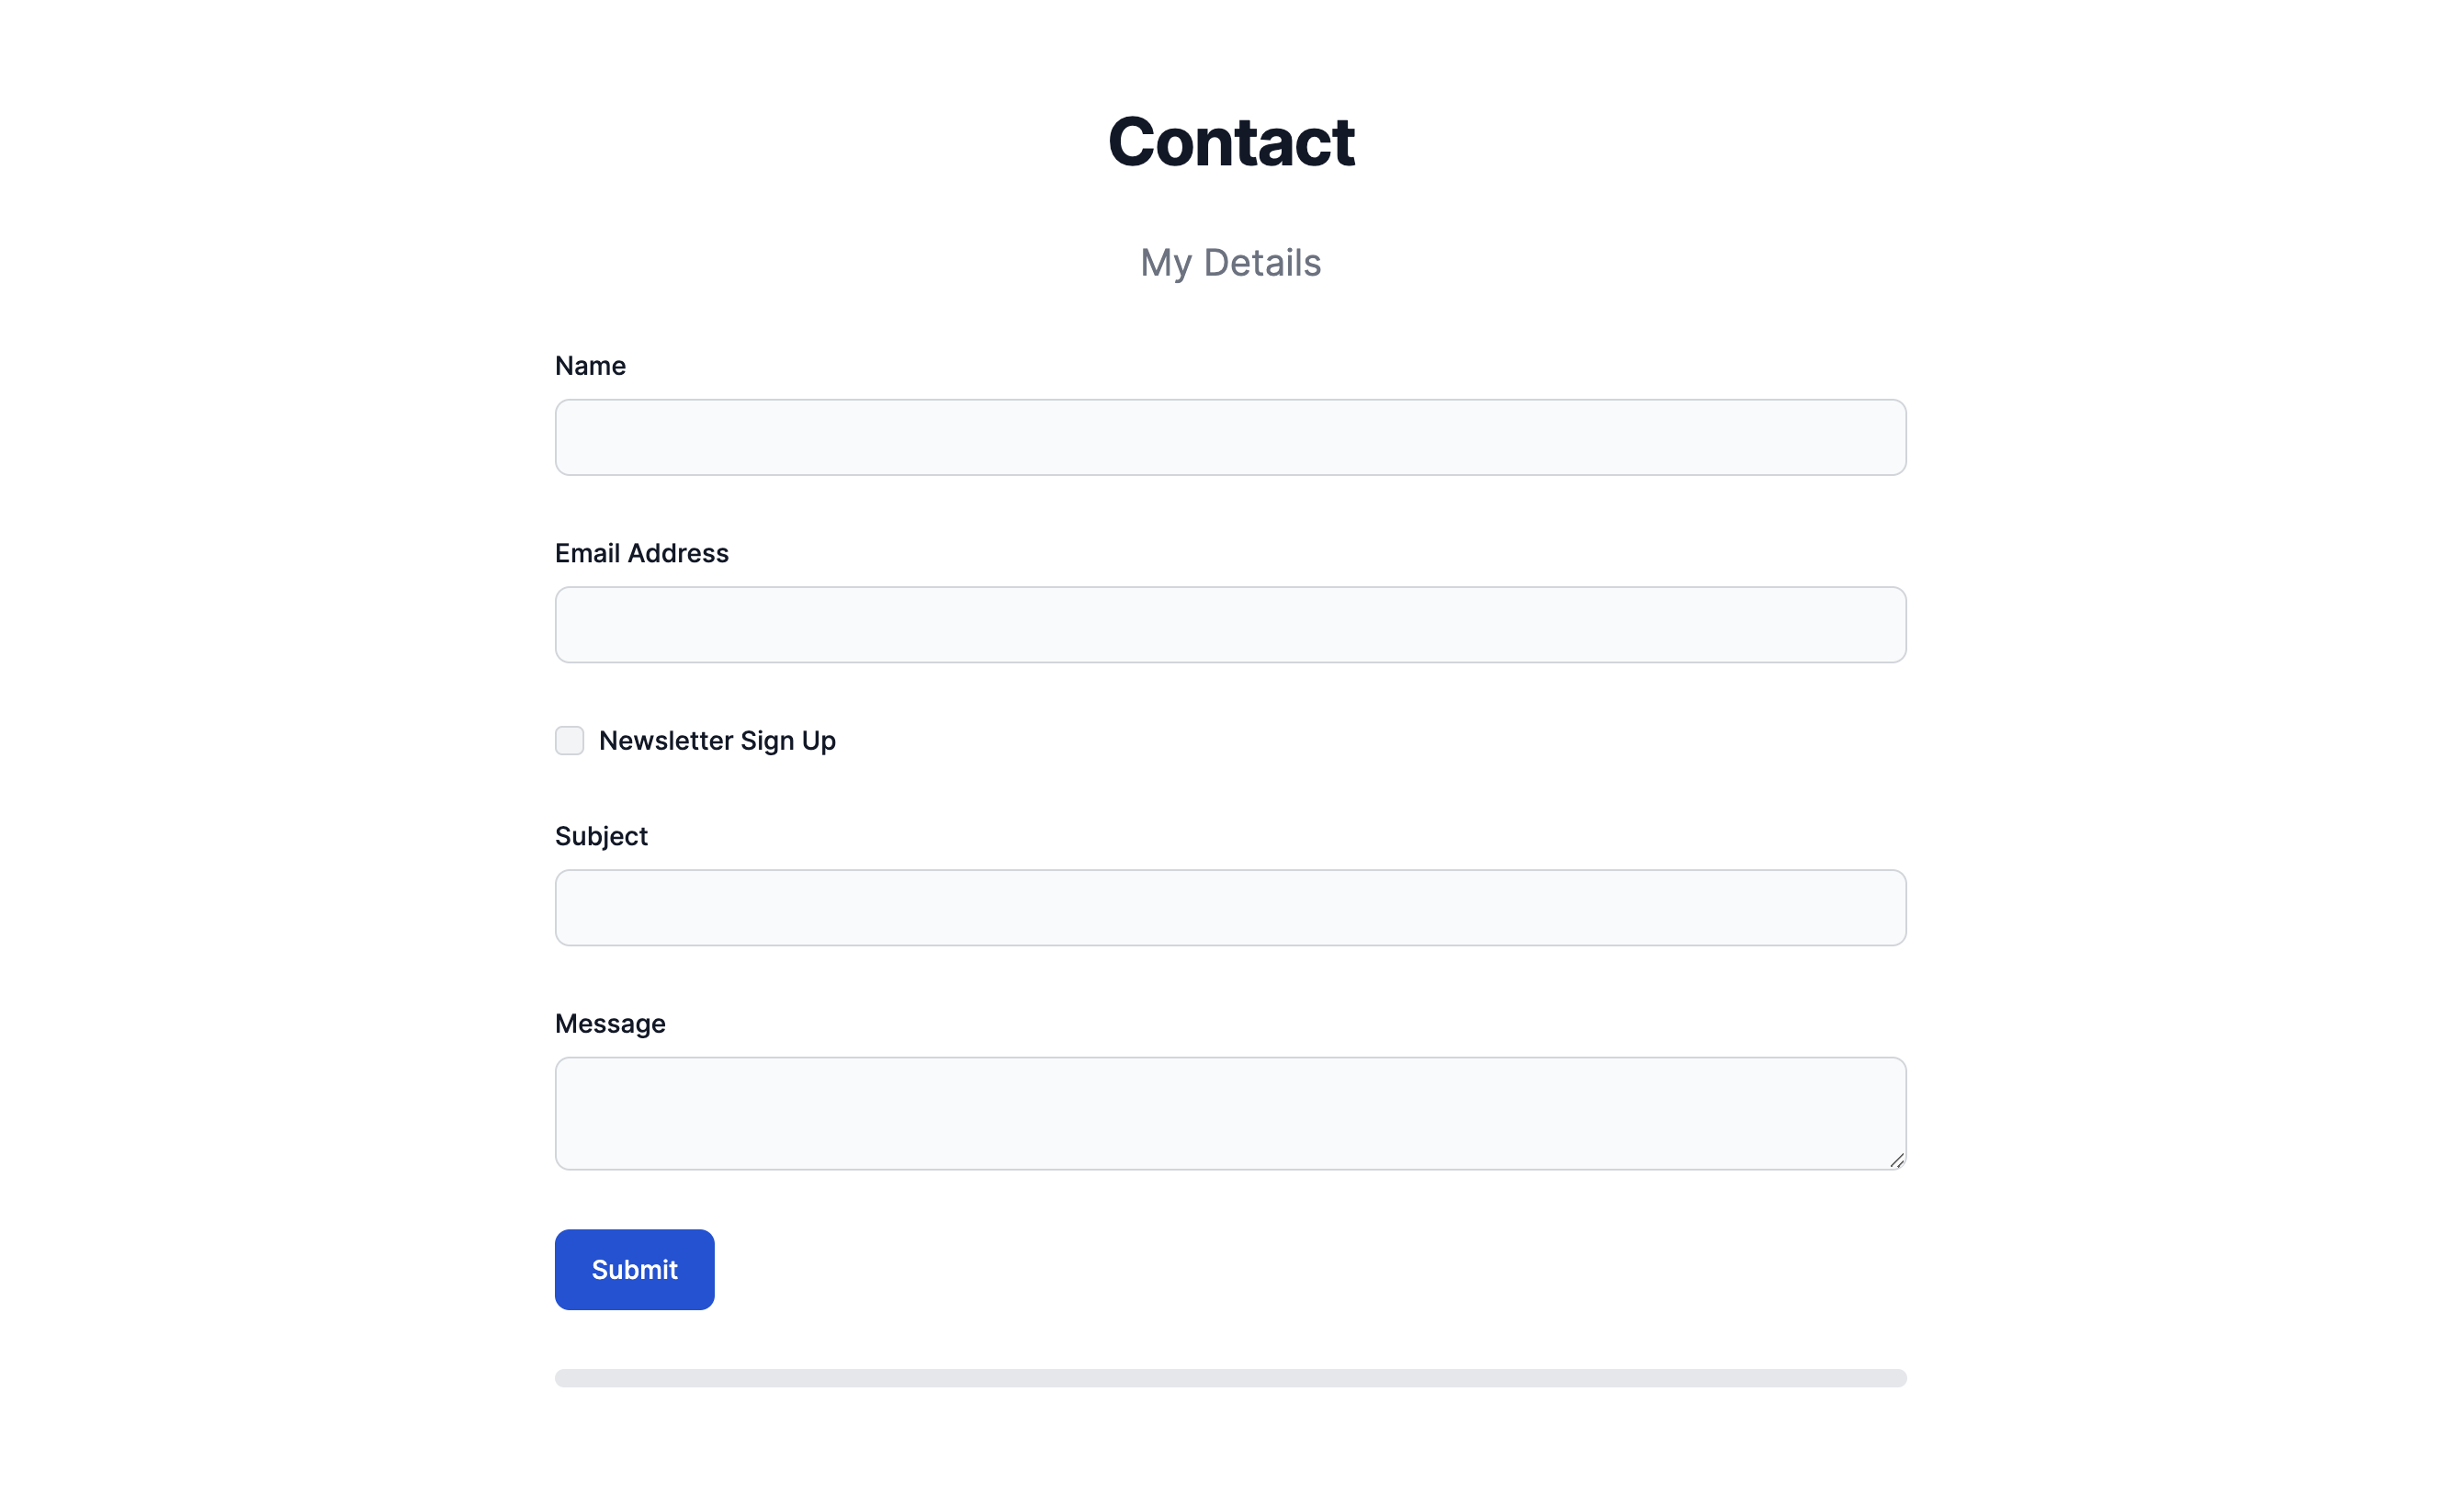
Components are files within the layout which are re-usable. This helps speed up development and achieve consistency as a string component need only have classes added once to re-style all <input type="text"> elements in the form. Components are used by both Static and Dynamic forms of each layout. Below is an example string.liquid component (the classList for the <input> has been simplified for the sake of readability!):
<div class="col-span-6 sm:col-span-3">
  <div class="">
    <label class="block mb-2 text-sm font-medium text-gray-900 dark:text-gray-300" for="{{name}}">{{label}}</label>
    <input {{attributes}} {{validation}} id="{{name}}" name="{{name}}" class="..." type="text" value="{{value}}">
  </div>
</div>
There is a component for each Siteglide field type that is available on standard forms. There are also components for additional features such as Secure Zones or eCommerce which can be used if required. Most layouts will include these extra fields as an option even if the layout design might not appear to need it, in case these are required in future. Once installed, the layout is yours and you can delete any components which are not needed.
Some Siteglide field types are available only for CRM fields at the moment. We will provide a component file for all of these, but it may be empty if we don't support that field type in your library yet.
The main components available are as follows:
| Field Type Components | |
| string.liquid | |
| boolean.liquid | |
| input_checkbox.liquid | |
| input_radio.liquid | |
| datasource_multi.liquid | |
| datasource.liquid | |
| date.liquid | |
| textarea.liquid | |
| select_multi.liquid | |
| select.liquid | |
| file.liquid | |
| Components with Unique Functionality | |
| hidden_fields.liquid | This contains hidden fields which are most likely to be edited, e.g. to override the form redirect. |
| email.liquid | Mandatory. |
| name_field.liquid | Mandatory. |
| password.liquid | Appears if Secure Zones are activated for the Form and right conditions are met. |
| recaptcha.liquid | Appears if reCaptcha is enabled for the form. |
| subheading.liquid | Only used if `collection` is set to false. |
| basic_payment.liquid | For eCommerce forms, the correct component will be included depending on the form's payment settings. |
| checkout_standard.liquid | |
| quote_only.liquid | |
| subscription_detail.liquid | |
More components may be added in future.
The main Liquid parameters passed into form layout components are as follows:
{{name}}
|
The name attribute's value. |
{{value}}
|
The value attribute's value. |
{{attributes}}
|
This normally adds the data-attributes needed to allow the Siteglide CRM to work correctly, where appropriate. |
{{validation}}
|
Normally contains either `` or `required` as required. For Siteglide, this needs to be included within the class list of the element (or in some cases e.g. checkbox groups, within the parent element's classList).
For libraries which use Bootstrap (or another library which relies on native HTML validation to some extent), it can also be useful to add the {{validation}} inside the element so that it also adds the required attribute to the element where required. |
{{field_id}}
|
The field's ID. |
{{label}}
|
The human-readable name of the field. Useful for labels. |
{{options}}
|
An array of options for this component, where needed. For example for a <select> component. |
{{form_redirect}}
|
Pulls in the default form redirect URL. |
{{form_payment_amount}}
|
Pulls in the default amount for Basic Payment Forms. |
{{form_payment_currency}}
|
Pulls in the default currency for Basic Payment Forms. |
{{include_email_editor}}
|
If `'true'`, the `password` component should display in order to allow the user to confirm their current password. This is necessary to confirm they have the required permissions to change their email address in another component. Inherited value. |
{{include_password_editor}}
|
If `'true'`, the `password` component should display in order to allow the user to confirm their current password. This is necessary to confirm they have the required permissions to change their email password in another component. Inherited value. |
{{confirm_email_password}}
|
If `'true'`, the `edit_password` and `edit_email` components should also display an additional confirmation field. Inherited value. |
{{hide_email_while_logged_in}}
|
This value is inherited from: [hide_email_while_logged_in](#the-hide_name_while_logged_in-and-hide_email_while_logged_in-parameters) |
{{hide_name_while_logged_in}}
|
This value is inherited from: [hide_name_while_logged_in](#the-hide_name_while_logged_in-and-hide_email_while_logged_in-parameters) |
Re-ordering fields in a Dynamic Form Layout using Siteglide CLI
Using Siteglide-CLI, it is possible to give your Form's custom fields an order property. This will affect the order they appear in the Siteglide Admin, default form layout and SiteBuilder Form Layouts. For dynamic SiteBuilder form layouts, changes in order will appear immediately, however for static form layouts, the order will only affect the initial install of the layout.
- Firstly, pull the site using Siteglide CLI.
- Next find the table's JSON file. The tables directory is at
marketplace_builder/views/partials/tables/. Within that, you can find directories for forms, webapps and modules, with each one containing files numbered by IDs. - (Optional) Convert the minified JSON into human-readable JSON. If using VSCode, you can use an extension like JSON tools or a similar equivalent for your IDE.
4.Inside the JSON file, find your custom field undercustom_fields, e.g.form_field_1_1. If theorderproperty already exists, edit it to a new number. Fields are ordered in ascending order, so the higher the number, the earlier in the form it will appear. Negative and decimal numbers are allowed. - (Optional) If you carried out step 3, minify your JSON file.
- Sync the JSON file to the site.
- Save the form in the Siteglide Admin. This copies the changes from the JSON file into the Form Configuration automatically. (Previously we recomended making changes to order in the form configuration directly, however, the method stated above is now the only reliable method.)
Default system field order
Since it is not currently possible to edit the orders of system fields e.g. name, email, using the above method, it's useful to note that we now assign default orders to these fields. We use negative values with large gaps between them deliberately, so that these fields default to the beginning of the form, but there is ample room for custom fields to be ordered before, between and after them.
- name: -40
- email: -30
- password: -20
- Categories: -10 (This refers to WebApp and Module item categories)
This is a breaking change in 4.3.0, so older sites which update to this version may need their fields re-ordered using the documented method.
Form Layout Sanitization
When outputting user-submitted values on a web-page e.g. the value attribute in a form field, there is a chance of a malicious user introducing executable code into that value by submitting it in a form field.
platformOS will automatically sanitize fields when values are outputted in {{ }} Liquid tags, unless the | html_safe filter is used. Since the html_safe filter is recommended in the main part of your Form Layouts, you may be re-assured to know that the value attribute will have been already outputted at the stage of your form components being rendered from Liquid to HTML by the server. This means the user-submitted values will have already been sanitized and you can use html_safe safely where we recommend it.
Enabling fields for controlling webapp visibility
On WebApps, fields like enabled, release_date and expiry_date were originally hidden away in hidden fields. We needed them to be there and inheriting default values, but didn't yet have UI support for them.
If you want users to be able to edit them, you can add custom code to the hidden field component and make them visible there.
Proper support for these fields will be added in a future update.